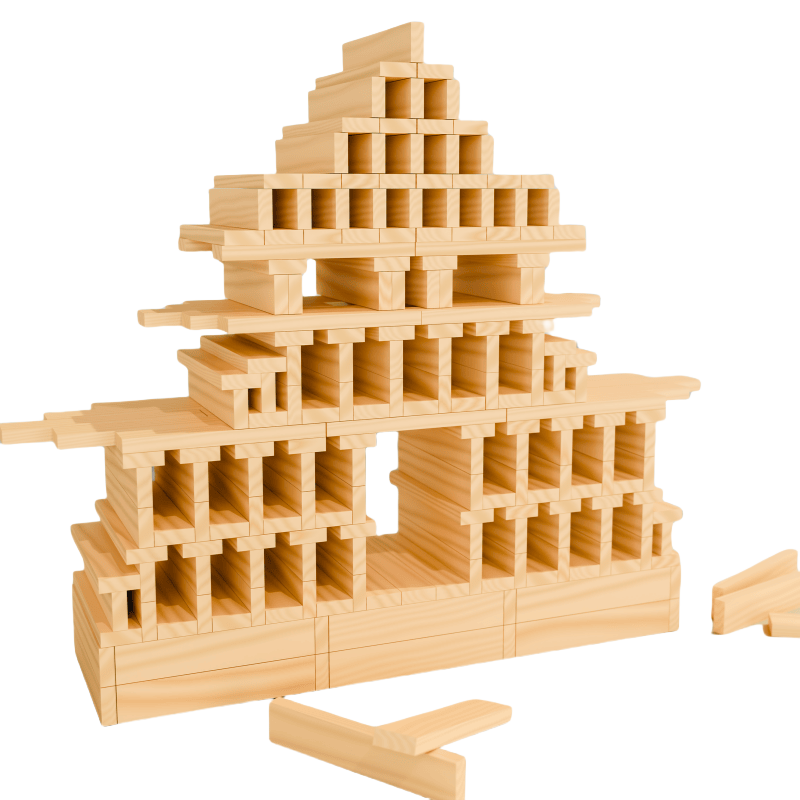
How to Build a Stable Tower With Wooden Planks: A Step-by-Step Guide
A tower built from flat wooden planks fails for one of three reasons, and almost never for a fourth. The base is too narrow, the joints sit directly on top of each other, or the builder keeps adding height after the structure has already started to lean. Everything below is a fix for one of those three problems.
Start with a base that is wider than the tower is tall
A useful rule of thumb for plank blocks: the footprint should be at least one third of the final height. If you are aiming for a tower 30 planks high, the bottom layer should cover an area roughly 10 planks across. This is the single change that rescues most failed builds.
Build the base as a solid slab rather than a hollow outline. A hollow base looks tidy but has almost no resistance to a sideways push, because the planks can slide against each other with nothing in the middle holding them.
Rotate the plank direction every layer
Planks are strong along their length and weak across it. If you stack four layers all running left to right, the tower behaves like four separate walls and will split along the grain lines. Alternate the direction each layer, or every second layer, so the structure locks itself together.
This is the same principle as plywood, and it costs nothing to apply. Watch the tower from above while you build: you want to see a woven pattern, not a stack of parallel lines.
Never line up the joints
The weakest point of any plank structure is a vertical seam where two plank ends meet. If the seam in layer two sits directly above the seam in layer one, the tower has a hinge running through it. Offset every seam by at least half a plank length from the layer below.
- Layer 1 seam at the left edge: put the layer 2 seam near the middle.
- Layer 2 seam near the middle: put the layer 3 seam back near the edge.
- Keep a 10–20 mm gap between neighbouring planks rather than pressing them tight — tight planks transmit vibration straight through the tower.
Keep the weight low
A tower does not collapse because it is tall. It collapses because the centre of gravity drifts outside the base. Every plank you add near the top moves that centre upward and makes a small lean much more dangerous.
If you want visual height without the risk, build a wide lower section and a narrow upper section, then stop adding width at about two thirds of the total height. The shape looks deliberate and the physics stays friendly.
Test with a nudge, not a shake
When the tower reaches about half its planned height, press two fingers gently against the side at the top and release. A healthy build returns to vertical. A build that stays slightly displaced is already failing and will not survive another ten layers — that is the moment to stop and widen the base, not to keep going.
A five-minute practice build
- Lay a 9 by 9 plank base, alternating direction every layer, until you have four solid layers.
- Build five pillars on top, spaced evenly, each two planks wide.
- Bridge the pillars with a single layer running the other way.
- Add two more pillar-and-bridge cycles.
- Finish with a single plank laid flat as a cap.
This gives a tower about 40 cm tall with a deliberately light top, and it is stable enough to survive a table bump. Once it stands, try the same build with a base of 6 by 6 planks and notice how much earlier it starts to lean — that difference is the whole lesson.
What to do when it collapses anyway
Look at where the planks landed. If they scattered outward, the base was too narrow. If one section slid off as a block, a seam was stacked. If the tower folded sideways at mid-height, the upper layers were too heavy for the pillars below. Each failure pattern tells you which rule to apply next time, which is why collapsing is a normal and useful part of building with planks.
For more step-by-step builds, see our tutorial collection, and if you are choosing a set size, the buying guide explains how many planks you actually need for towers of different heights.
Sourcing wooden building blocks for retail or your own brand?
MOQ, lead times, EN71 / ASTM documentation — quoted within one business day.
Start here
Step-by-step tutorials · Building tips · Buying guide · FAQ · Wholesale & OEM